PA3: Textures
Add visual complexity to your renders by adding 2D and 3D textures.
We will primarily be referring to chapters of Ray Tracing - The Next Week in this assignment.
Task 1: The Texture class (1 pts)
Read Ray Tracing - The Next Week: Chapter 4, and create a Texture base class following this chapter (perhaps in a new texture.h file within your include/darts directory). Remember to add this file to the list of headers or source files in CMakeLists.txt.
We suggest a few design changes compared to the book: Instead of naming the main function value, we suggest naming it color and, instead of accepting u, v, and p parameters, we suggest you have it take a const HitRecord & as the parameter (you can then retrieve u, v, and p from within this HitRecord). In fact, it can be useful to allow textures to vary based on the incoming ray, so we include that as an additional parameter.
Here is what our interface looks like:
// Base class for all textures
class Texture
{
public:
    Texture(const json &j = json::object());
    virtual ~Texture() = default;

    virtual Color3f color(const Ray3f &ray, const HitRecord &hit) const = 0;
};
We put our implementation file in src/textures/texture.cpp.
Constant textures
Create a derived class ConstantTexture : public Texture which has a member variable Color3f constant; and whose color(...) function just returns it. Make a constructor that takes a const json &j and tries to assign the parameter named "color" to your constant member variable by using j.value("color", constant);. We put both our class definition and implementation into the file src/textures/constant.cpp.
Retrofitting the parser
To make this work with the rest of darts, we need to refactor our code a bit so that Materials use Textures instead of Color3fs, and so that it plays nice with our JSON parser.
We first need to inform our JSON parser how to create each type of texture, and what type string (e.g. "constant") to look for when creating it. Calling the following macro at the bottom of src/textures/constant.cpp will do this for the new ConstantTexture:
DARTS_REGISTER_CLASS_IN_FACTORY(Texture, ConstantTexture, "constant")
Now, change all the Color3f members of your Materials to Textures, e.g. Color3f albedo; in Diffuse becomes shared_ptr<const Texture> albedo;. You'll also need to change the corresponding constructors of any Material to call DartsFactory::create() instead of reading a color directly from the passed json object, e.g. this:
albedo = j.value("color", albedo);
becomes:
albedo = DartsFactory<Texture>::create(j.at("color"));
DartsFactory::create() will look for a "type" field in the passed-in json object, and create the appropriate Texture subclass. This works because of the DARTS_REGISTER_CLASS_IN_FACTORY macro we called earlier.
You'll also want to support texturing the Metal::roughness parameter. This is currently a float, so we'll need to extend our Texture class a bit.
One approach would be to treat color and grayscale textures as separate types, or to allow roughness to differ across the three color channels, but we'll stick with a simpler approach: Add a virtual value(...) method to the Texture base class so that textures can either output color or scalar values. So derived classes don't have to implement both, we'll also provide automatic conversion between these two possible outputs: we can convert a color texture into a scalar using the luminance() function in darts/; alternatively, we can convert a scalar texture into a color by replicating the value across the R,G, and B channels.
In the end, this is what our Texture interface looks like
// Base class for all textures.
class Texture
{
public:
    Texture(const json &j = json::object());
    virtual ~Texture() = default;

    /*
        Look up the color of the texture at the hit point #hit.

        The default implementation just returns #value() in all three color channels.

        Subclasses must implement at least #color() or #value().

        \param [in] ray Incoming ray (pointing at the surface)
        \param [in] hit Local hit information
        \return         The color
    */
    virtual Color3f color(const Ray3f &ray, const HitRecord &hit) const
    {
        return Color3f{value(ray, hit)};
    }

    /*
        Look up the scalar value of the texture at the hit point #hit.

        The default implementation just returns the luminance of #value().

        Subclasses must implement at least #color() or #value().

        \param [in] ray Incoming ray (pointing at the surface)
        \param [in] hit Local hit information
        \return         The value
    */
    virtual float value(const Ray3f &ray, const HitRecord &hit) const
    {
        return luminance(color(ray, hit));
    }
};
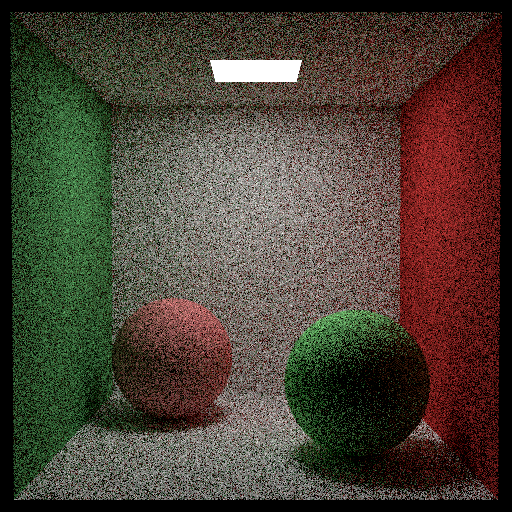
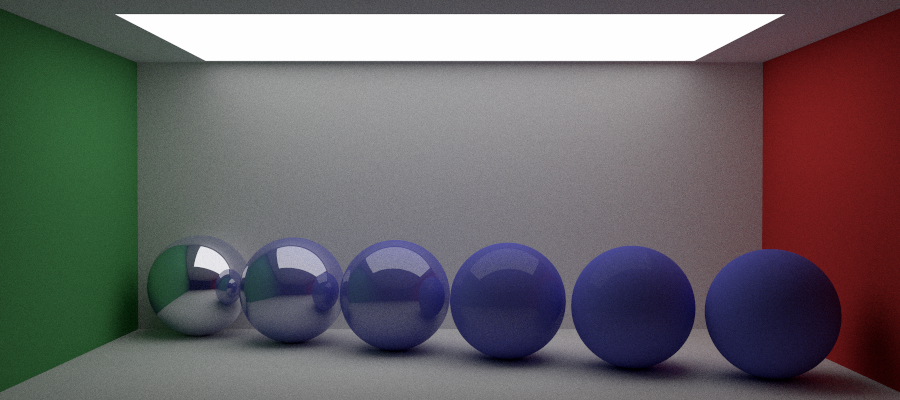
Once you have this implemented, you should be able to render the scene scenes/assignment3/constant-cornell-box.json. This scene looks similar to the Cornell box from the previous assignment, except all albedos are now specified with a constant texture.
Backwards scene compatibility
One nuisance with our current solution is that we would have to re-write all our previous scene files (that directly specified a color) to instead use a "constant" texture. Previously we could have simply written:
"color": [0.8, 1.0, 0.3],
in the scene file, but now we have to write the more clunky:
"color":
{
    "type": "constant",
    "color": [0.8, 1.0, 0.3]
}
Let's add backwards compatibility so that the scene can specify colors directly too.
Take a look at DartsFactory::create() in darts/factory.h. Recall that this method of our DartsFactory is responsible for creating instances of materials, surfaces, etc. (determined by the base class T) by checking for a "type" field in the passed-in json object. We'd like the factory to do something a bit more sophisticated when we try to create a subclass of Texture.
To do that, we'll need to create a specialization of the DartsFactory::create() method that is used specifically when the template type is a Texture. Create a method in factory.h with the following signature (just below the current DartsFactory::create() implementation):
template <>
inline shared_ptr<Texture> DartsFactory<Texture>::create(const json &j)
{
    // your code here
}
Start by copying over the implementation of the generic DartsFactory::create() method.
To allow backwards compatibility, you can inspect the const json &j by calling j.is_object(), j.is_array() or j.is_number(). If j is an object, you can proceed just as in the generic implementation to construct the appropriate Texture. However, if j is an array or number, you should create a ConstantTexture directly. You can do this by calling BaseFactory::create_instance("constant", ...). Note that you may also need to modify your ConstantTexture constructor.
Once you have this implemented, you should be able to render all the scenes from the previous assignment. Give it a try.
Task 2: Solid textures (Undergrad 3 pts Grad 2pts)
You now have the framework to easily add other types of textures, and these textures can be used any place you previously used a fixed Color3f!
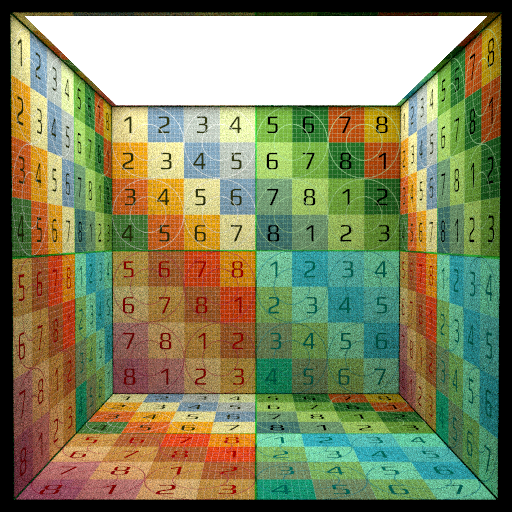
Checkerboard
Add a CheckerTexture class following the description in Section 4.3 of the book, but adapted to the darts framework. To make your texture compatible with our Blender exporter, your constructor should look for fields named "color1" and "color2" (instead of the names "odd" and "even" like in the book). Use those together with DartsFactory<Texture>::create() to create the corresponding textures for the two types of squares. Make sure to register the new texture with the factory using the DARTS_REGISTER_CLASS_IN_FACTORY macro like before, but this time associate it with the type string "checker".
Once you have this implemented, you should be able to render the scene scenes/assignment3/checker.json producing an image like the one shown here.
Testing out the Blender exporter

We provide a Blender addon to allow you to design your scenes in Blender and export the scene to a darts-compatible .json scene along with all meshes and textures.
Download Blender for your platform, and install it.
Read the README.md file in the blender-darts-export folder of the basecode repository and install the addon in Blender.
We provide a few example Blender scene files, which you'll be able to convert to darts scenes.
Open up the checker-sphere.blend scene file. You should see something like the image on the right.
Now, export this scene to darts by going to File -> Export -> Darts scene (.json). This should show you a dialog like in the second image on the right.
The exporter has a number of options on the right side of the file dialog. Examine it to get a general sense of what is possible. These options exist so you can include or omit certain features from the darts scene file until you have added the corresponding feature to your code.
Set the following options:
Scene/Integrator: None
Scene/Sampler: None
Scene/Export lights: Off
Geometry/Convert to: one mesh per Blender object
Geometry/Write OBJ files: On
Material conversion/Materials: Convert Blender materials
Material conversion/Force two-sided materials: Off
Material conversion/Glossy as: metal
For now, you can leave all the textures listed under "Texture conversion" checked. The checker-sphere.blend scene only contains a checker texture anyway.
Export your scene to a subdirectory of darts scenes folder. Then try to render it.
You should get an image that looks similar to the one in Blender.
Fractal noise
Noise is a basic building block of many procedural textures. Read Chapter 5 of the book for an explanation and to see one implementation approach for Perlin noise.
Instead of worrying about the low-level details of Perlin noise, we provide you our own implementation in darts/noise.h and src/noise.cpp. Compared to the book's version, which precomputes and stores tables of random values, our implementation relies entirely on procedural hashing and works in 1, 2, 3, and 4 dimensions. You will instead focus on building higher-level features on top of this base implementation. In particular, your goal is to implement support for Blender's "Noise" texture node.
Open up noise.blend in Blender. Notice that the bottom panel shows the "Shader editor" which represents textures and materials as nodes that are connected together via links. The Noise Texture node allows setting a number of parameters, including the dimensionality, the type (we'll only concern ourselves with fBM), scale, detail, roughness, lacunarity, and distortion. These inputs can be set numerically directly on the node. Alternatively, some of these inputs can themselves be driven by some other texture node (the circles on the left side of the node are input "sockets" that can be linked to the output "sockets" of another node). The Noise Texture node has two output sockets (the circles on the right side of the node): it allows outputting either grayscale noise ("Fac") or color noise ("Color").
Add a NoiseTexture class, which will implement Blender's Noise Texture node. Put your implementation in src/textures/noise.cpp and call
DARTS_REGISTER_CLASS_IN_FACTORY(Texture, NoiseTexture, "noise")
to register it with the factory.
For this task, you need to implement support for the Scale, Detail, Roughness, and Lacunarity input parameters for 3D fBM type noise, and both Fac and Color output. Scale simply scales the size of the texture (higher values create smaller-scale random bumps). Detail, Roughness and Lacunarity define parameters to a fractal sum of octaves. Detail maps to the number of octaves from one octave (Detail=0) to a maximum of 16 octaves (Detail=1). Lacunarity is the factor by which noise frequency gets scaled in each successive octave (Lacunarity=2 means octave 2 has twice the frequency of octave 1, and so on). Roughness is the factor by which amplitude is scaled in each successive octave (Roughness=0.5 means octave 2 has half the amplitude as octave 1, and so on).
We suggest you start with the grayscale Fac output and put your implementation in NoiseTexture::value(...). Once you have that working, implement the Color output in your NoiseTexture::color(...) method. This can return the same thing that NoiseTexture::value(...) does, but to produce different red, green, and blue values, you should randomly offset the noise lookup for each of the three components of the output Color3f. The vector_noise_offsets constants in darts/noise.h already provide you with pseudo-random offsets you can use.
Wave (Marble and Wood) texture
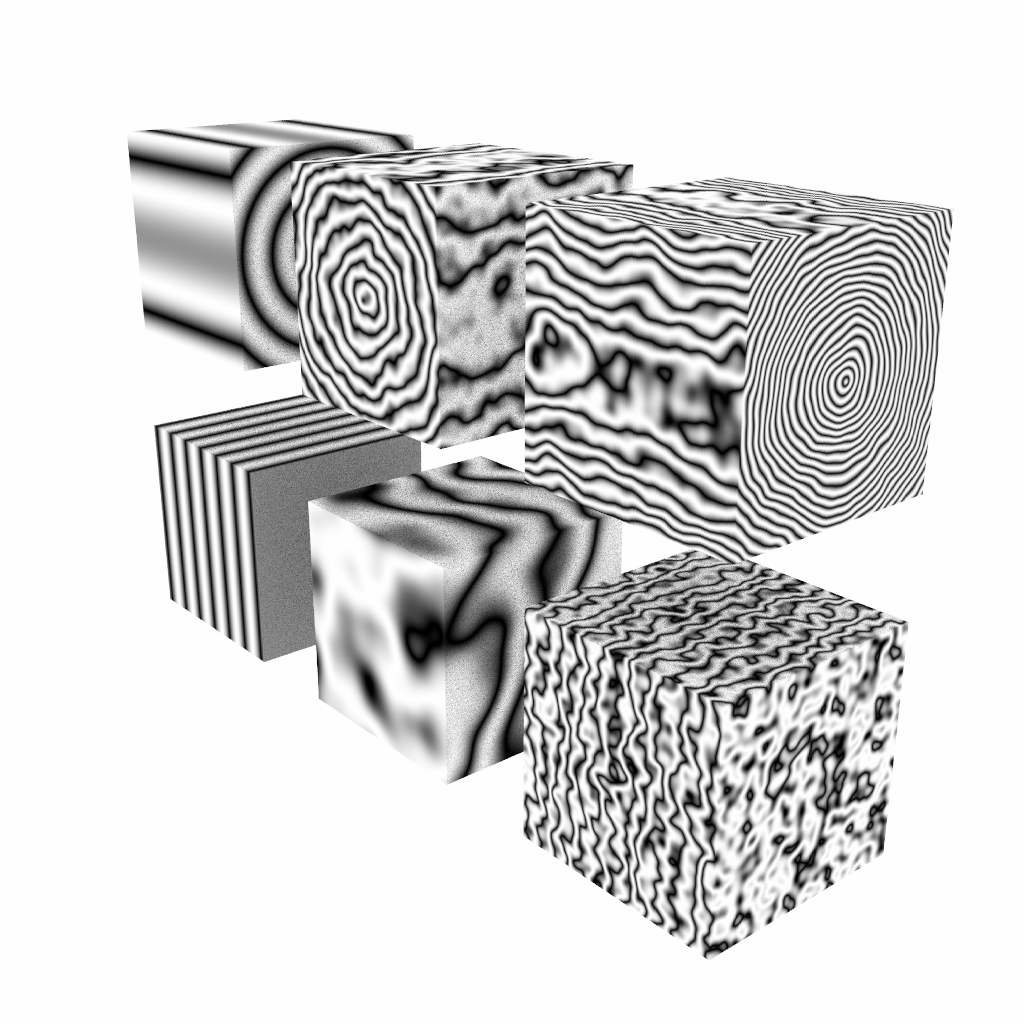
Next you will add support for Blender's Wave texture node in darts. The wave texture is similar in spirit to the noise_texture explained towards the end of Chapter 5 in the book, but Blender's version is more general – allowing you to mimic both veins of marble and wood rings.
Open up wave.blend in Blender and take a look at the Wave Texture node in the shader editor. You'll notice this texture node contains a number of inputs, including the Wave Type (bands or rings), the direction (X, Y, Z, or diagonal), and the wave profile (Sine, Saw, or Triangle). There is also the Scale, Distortion, Detail, Detail Scale, Detail Roughness, and Phase Offset. Play around with all these parameters in Blender to get a sense of how they affect the texture.
You will implement a subset of the Wave texture functionalityas a new WaveTexture class (we suggest you put your implementation in the new file src/textures/wave.cpp). Make sure to register the WaveTexture using the type name "wave" in the DartsFactory and add the file to your CMakeLists.txt.
You are required to support both bands and rings-type waves, as well as the X, Y, and Z directions (you can skip Dialognal and Spherical). You only need to implement the Sine profile type. You should also support the Scale, Distortion, Detail, Detail Scale, Detail Roughness, and Phase Offset parameters. Since these are input sockets, each of these parameters will end up being a shared_ptr<const Texture> in your WaveTexture class. This texture type produces exactly the same grayscale output in Blender whether you use the Color or Fac output socket. So, you can implement the texture in the WaveTexture::value(...) method, and just inherit the default implementation of the color(...) method that we defined for Texture above.
Export the wave.blend scenes to darts and render it.
Transforming texture lookups (optional)
Particularly with procedural textures, you might find it useful to be able to scale, rotate, and otherwise transform how the textures are placed on your surfaces. The PBR book discusses one approach.
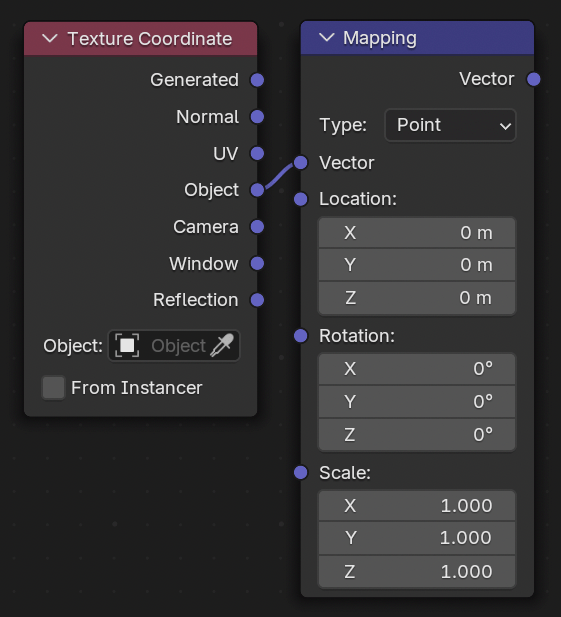
Additionally, you might want to apply one texture using UV coordinates, and another texture using the hitpoint's x,y,z coordinates, but in the object's local space. In general, it would be nice to be able to choose between many possible texture coordinates for the same object. Blender has a clever solution for this – it's Texture Coordinate and Mapping nodes.
You may have noticed that many texture nodes have a Vector input socket. Linking this input to the output of a Texture Coordinate node allows us to choose the type of texture coordinate to use for texture lookups (for instance, we can use the shading normal as the texture coordinates, or use the hit point coordinates in the object's local space, or in the space of the camera). Interestingly this Texture Coordinate node can itself be implemented as a darts texture (since 3D coordinates and colors can both be stored as 3-component vectors)!
You can also optionally pass the texture coordinates through a Mapping node to apply an affine transformation to the texture coordinates. Just like the Texture Coordinates node, this Mapping node can itself be implemented as a darts Texture (since we store colors and 3D coordinates using the same Vec3f data structure).
You are not required to implement these two nodes, but doing so now (or for the final project) will give you much more flexibility in texturing your scenes.
Task 3: Image texture mapping (Undergrad 4 pts Grad 3 pts)
The ImageTexture class
Read Chapter 4 of the book and implement image texturing mapping. We already provide you with image loading support, which you should leverage using the Image3f class defined in include/ and src/image.cpp. Your ImageTexture class should accept a "filename" string parameter from the json object. Once you read this string, use the global file resolver to resolve this filename into a path, like so:
string path = get_file_resolver().resolve(filename).str();
get_ is defined in darts/.
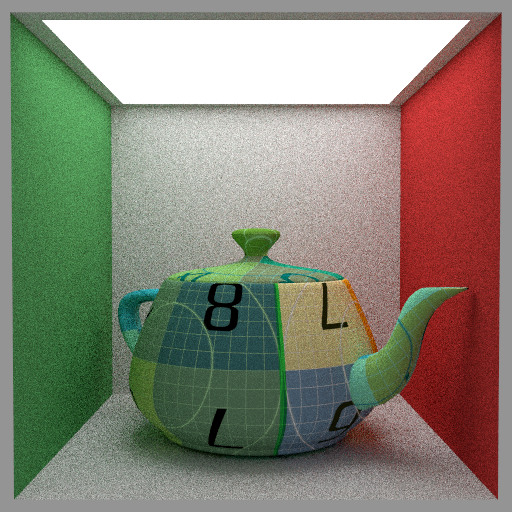
Texture coordinates
Extend your Sphere::intersect() function to output the UV coordinates as described in the book. Since there are many different conventions for spherical coordinates and uv coordinates, we already provide handy functions to consistently perform the Cartesian-to-spherical or spherical-to-Cartesian coordinate mappings for you. They are direction_ and spherical_ in include/. You should now be able to render scenes/assignment3/earth.json.
Next, extend your Quad::intersect() function to output UV coordinates. Render scenes/assignment3/textured-box.json.
Finally, extend single_triangle_intersect() to output UV coordinates. The function already receives three parameters (t0, t1, and t2) that specify the UV texture coordinates at the three triangle vertices. As with the normals, if the mesh doesn't provide per-vertex UV coordinates Triangle::intersect() passes nullptrs for the t0, t1, and t2 parameters and you'll need to fall back to some reasonable default. In this case, you should just store the barycentric coordinates in place of interpolated UV coordinates in hit.uv.
If you render scenes/02/triangles_textures/teapot.json you should see a scene with a teapot mesh that has texture coordinates and a texture applied, as shown below.

Task 4: Fresnel mix material (1.5 pts)
Many real-world materials have a more complex structure because the surface actually consist of multiple layers: e.g. a clear varnish on top of wood. There are many sophisticated techniques in graphics that try to model such multiple layers in a physically based way. We will instead take a physically inspired but simple approach to blend between a dielectric varnish and a substrate layer based on the index of refraction of the varnish.
We will first implement a simple linear blend between two material. Implement the class MixMaterial in a new file src/materials/mix.cpp. This material will blend between two materials based on a user-specified factor, and then call a different scatter() function for each. To handle this, the material should store two shared_ptrs to Materials (specified as "a" and "b" in the JSON file) and a shared_ptr to a Texture ("factor" in JSON) specifying the amount to blend between a and b (0 giving full weight to a, and 1 giving full weight to b). Make sure to register the new material with the DartsFactory and add it to your CMakeLists.txt file.
In the MixMaterial::scatter() function, evaluate the factor texture's value(...) function. Using the calculated percentage, draw a random number using randf(). If randf() is less than the percentage, then call the scatter() function of material b, otherwise, call the scatter() function of material a.
You should now be able to render scenes/assignment3/mix.json.
This allows us to blend with a user-specified amount, but real varnish exhibits Fresnel reflection, where the surface becomes increasingly reflective at grazing angles. Since our MixMaterial stores the blend factor as a texture, we can accomplish this by creating a texture that changes the blend factor based on the angle between the ray and the surface normal. Implement a new FresnelTexture in a new file src/textures/fresnel.cpp. This texture should take a single parameter "ior", specifying the index of refraction. The FresnelTexture::value function should then evaluate the Fresnel equations for the given ray ray and hit normal stored in hit. We provide an implementation of the full Fresnel equations as fresnel_dielectric() in include/darts/material.h.
We can now vary the amount of reflection and refraction based on the view direction, by using our FresnelTexture to specify the blend "factor".
Render scenes/assignment3/fresnel_mix.json.

Task 5: Normal mapping (grad students only; undergrad extra credit) (2 pts)
Implementing either bump mapping or tangent-space normal mapping. Ch. 10.5.4 of the PBR book covered bump mapping, and there are many resources online [1, 2, 3, 4] to learn about normal mapping.
Think about how this should be specified in the JSON scene file, and how you would need to extend your implementation to support modifying the surface normal appropriately. In our implementation, we a normal map acts as a wrapper around another material. It is specified in the JSON file like (this is also what our Blender exporter assumes):
{
    "type": "normal map",
    "name": "some material name",
    "normals": {
        "type": "image",
        "filename": "the_normal_map.exr"
    },
    "nested": {
        "type": "diffuse",
        "color": [0.75, 0.75, 0.75]
    }
}
For either of these techniques you will need access to not just the surface normal at the hit point, but also the tangent (and bi-tangent). Hint: you will need to compute a globally-consistent uv parametrization. The tangent and bi-tangent are then simply and . Extend the HitRecord structure and return this information for the surfaces that support bump/normal mapping. Normal mapping requires a bit less work to implement, so we recommend you start with that.
Render some images with the technique turned on/off and which convincingly show that this feature is working correctly.
Task 6: Interesting scene (0.5 pts)
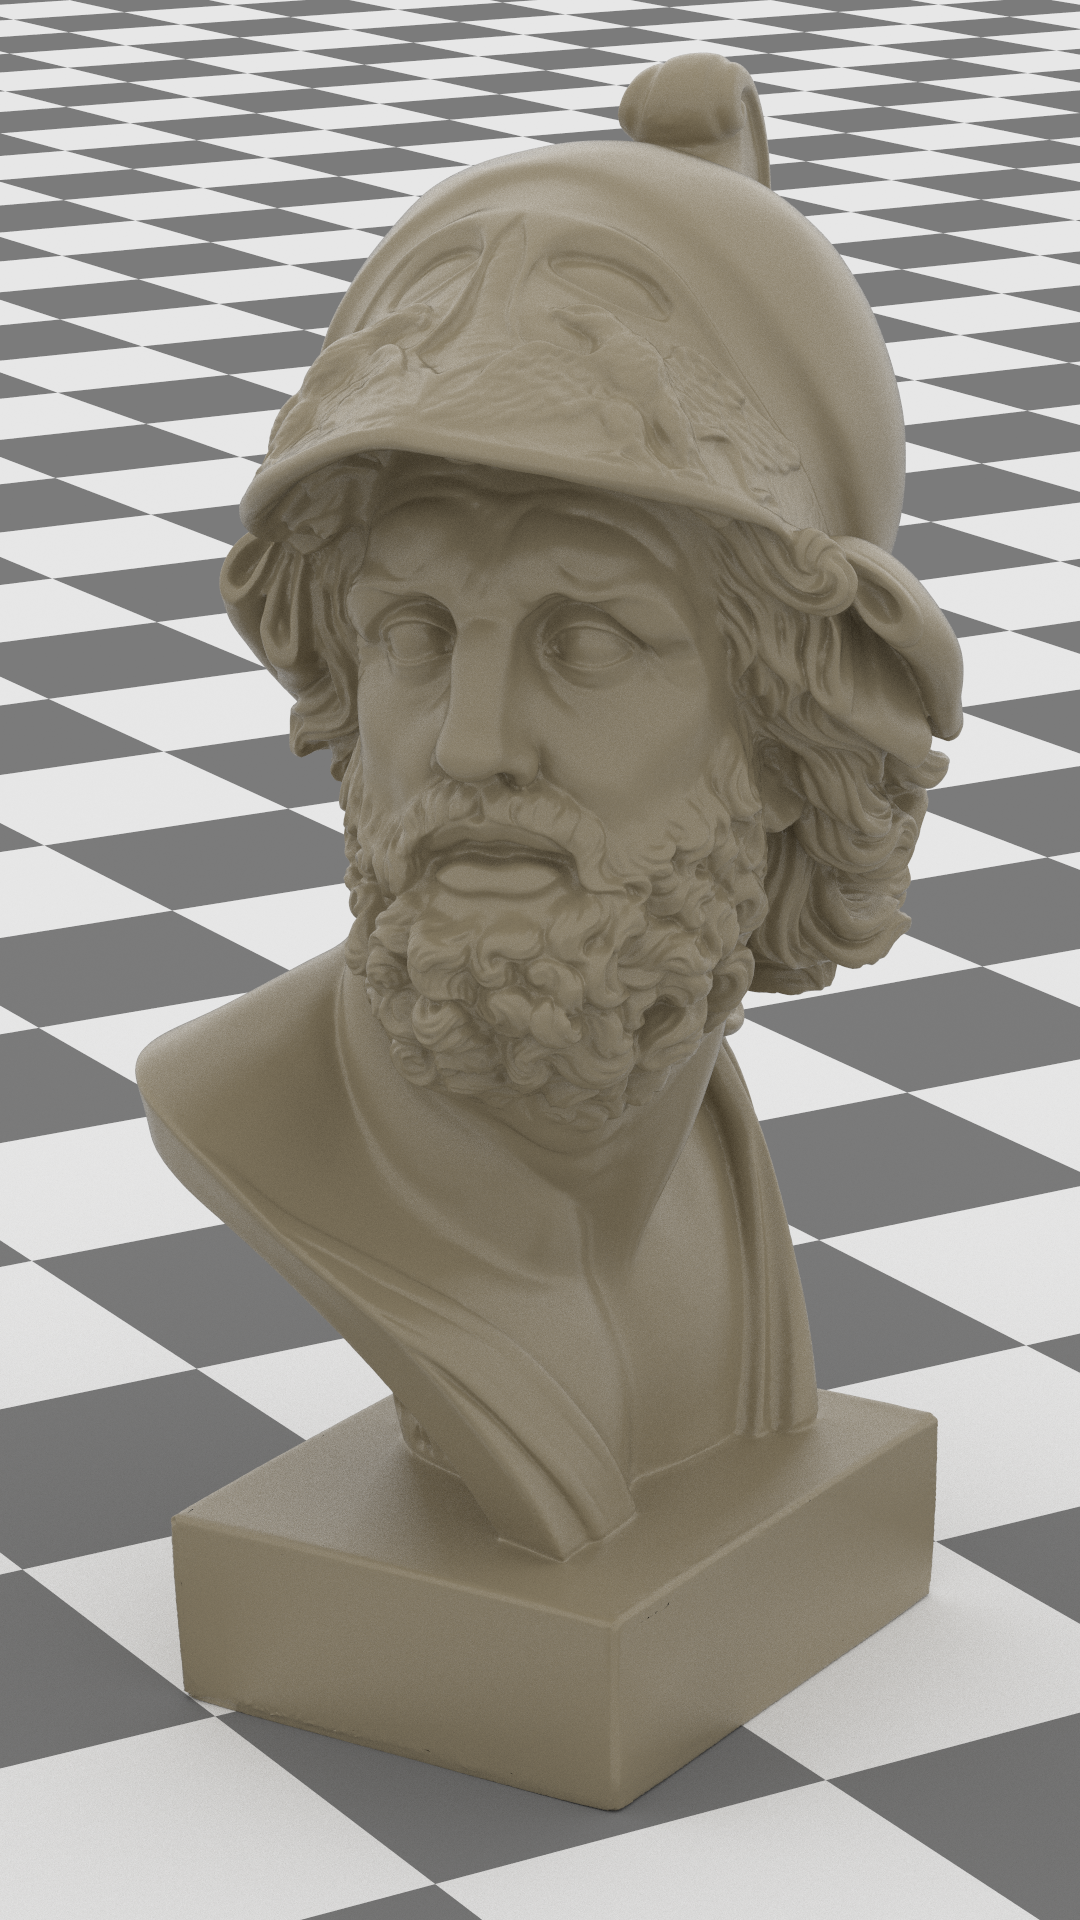
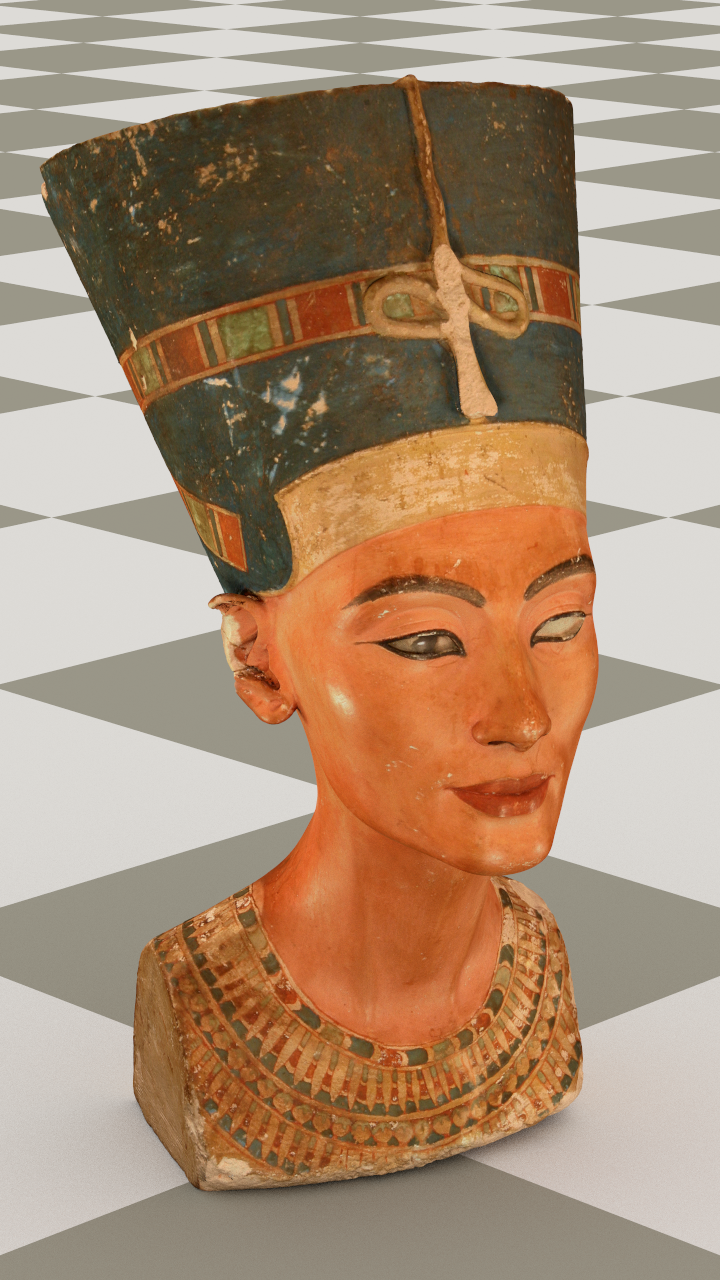
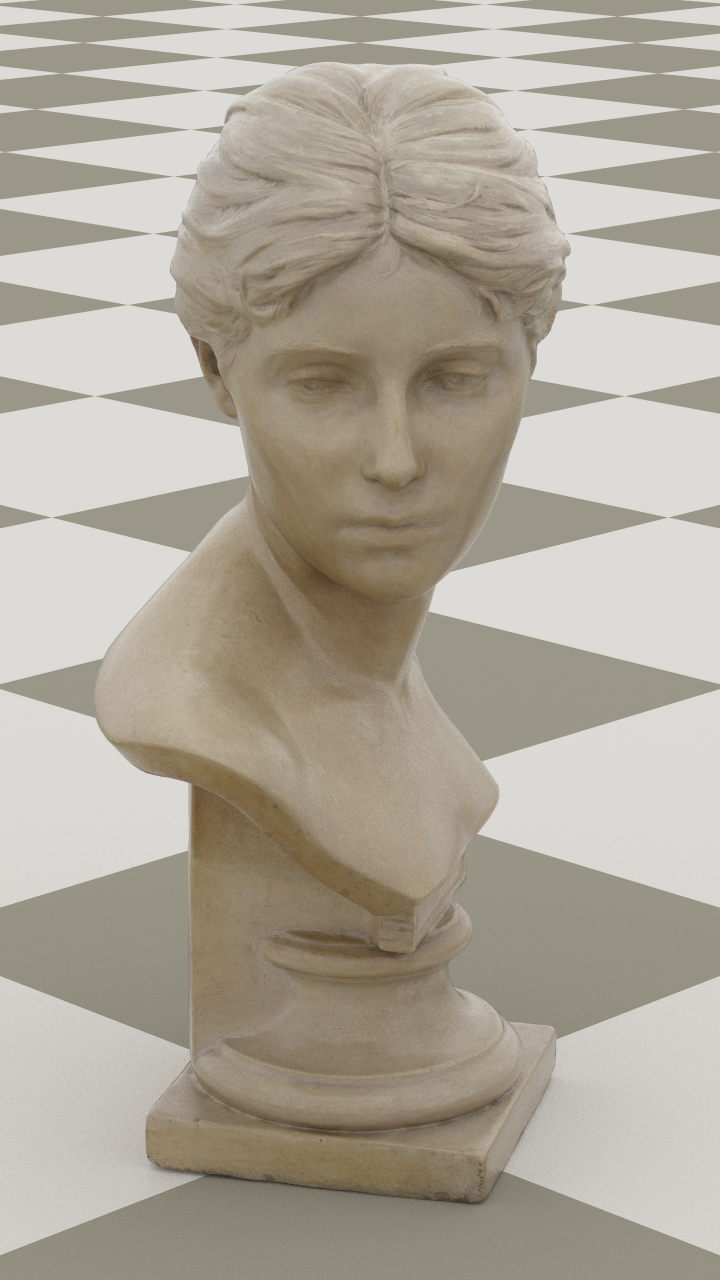
Now create an interesting scene (or scenes) showcasing all the features you've implemented. Be creative. Find some interesting meshes and textures online, or create some new procedural textures by combining your existing functionality. Consider applying textures to various parts of a material, like the blend factor, the roughness, and emission. Sketchfab.com and polyhaven.com have thousands of high-quality textured meshes available for free. Here's a few that we created and provide the darts or Blender scene files for:

What to submit
In your report, make sure to include:
- Rendered images of all the scenes in
scenes/assignment3and your interesting scene
Then submit according to the instructions in the Submitting on Canvas section of Getting started guide.