Discovery cluster
Optional tutorial to build and run darts on Dartmouth's discovery cluster to render images on many computers at once.
As we get closer to the final project, you may find it useful to be able to render images on many machines at once. Students in the class can use Dartmouth's discovery cluster. This page steps you through getting your code to build on the cluster, and submitting a render job to the jobs queue.
Logging in
If you are outside the dartmouth network, make sure you first connect to the VPN.
Then SSH into the login node:
$ ssh username@discovery8.dartmouth.edu
Here the username is your seven-digit student ID.
Clone your git repo
You'll want to clone your GitHub repo somewhere within your home directory on discovery. To get this to work you'll need to either set up your personal access tokens or ssh keys on GitHub. Once you do, clone your repo.
Set up CPM_SOURCE_CACHE to speed up CMake configures (do this once)
Go to your home directory and create a cache for CPM:
$ mkdir -p $HOME/.cache/CPM
Open up your .bash_profile in a text editor (e.g. using the command nano $HOME/.bash_profile) and export the CPM_SOURCE_CACHE variable to make the end of the file look like this:
# User specific environment and startup programs
export CPM_SOURCE_CACHE=$HOME/.cache/CPM
Save the file (in nano hit Ctrl-O, then Ctrl-X).
Configure darts
Make sure you are in your root darts directory and run the following CMake command to configure darts:
$ cmake -B build
For a successful configuration, you will see this message at the end:
-- Build files have been written to:...
Compiling darts
To avoid overloading the login node, we will compile Darts using the srun command which will run this on a compute node:
$ srun --account=cs_comp --mem=16G cmake --build build --parallel
The --account and --mem parameters are important.
If the compilation fails, remove the --parallel flag on the CMake command, and try again.
For a successful compilation, you will see some messages like these at the end:
[ 91%] Linking CXX executable point_gen
[ 91%] Built target point_gen
[ 93%] Linking CXX executable darts_tutorial0
[ 94%] Linking CXX executable test_tri_intersection
[ 94%] Built target darts_tutorial0
[ 94%] Built target test_tri_intersection
[ 95%] Linking CXX executable darts_tutorial1
[ 95%] Built target darts_tutorial1
[ 97%] Linking CXX executable img_avg
[ 98%] Linking CXX executable img_compare
[ 98%] Built target img_avg
[ 98%] Built target img_compare
[100%] Linking CXX executable darts
[100%] Built target darts
Rendering images on the cluster
To render a scene, you'll need to create a slurm script which instructs the job scheduler how to run your program. We provide a template slurm script to run a job array test-slurm-job.sh. Open it up to see how it is structured. There are several special comments that give parameters to the scheduler. The most important line is at the very bottom where you list what executable will be run.
This test script will render the jensen_box_diffuse_mats.json scene on 32 separate nodes, each saving its result as an .exr file in the results directory (note, you will need to create this output directory otherwise your jobs will not write out anything). You could run this job using the command:
$ sbatch ./test-slurm-job.sh
If all goes well, you should see something like this:
Submitted batch job 695045Checking on the status of your render jobs
To check the progress of your render jobs you can run the command:
$ squeueFor the above test job I got the following result:
         JOBID PARTITION     NAME     USER ST       TIME  NODES NODELIST(REASON)
695045_[30-32]  standard darts_re  mynetid PD       0:00      1 (AssocGrpCpuLimit)
      695045_0  standard darts_re  mynetid  R       0:18      1 m08
      695045_1  standard darts_re  mynetid  R       0:18      1 m08
      695045_2  standard darts_re  mynetid  R       0:18      1 m16
      695045_3  standard darts_re  mynetid  R       0:18      1 m16
      695045_4  standard darts_re  mynetid  R       0:18      1 k04
      695045_5  standard darts_re  mynetid  R       0:18      1 k05
      695045_6  standard darts_re  mynetid  R       0:18      1 k06
      695045_7  standard darts_re  mynetid  R       0:18      1 q03
      695045_8  standard darts_re  mynetid  R       0:18      1 q03
      695045_9  standard darts_re  mynetid  R       0:18      1 q03
     695045_10  standard darts_re  mynetid  R       0:18      1 q03
     695045_11  standard darts_re  mynetid  R       0:18      1 q03
     695045_12  standard darts_re  mynetid  R       0:18      1 q03
     695045_13  standard darts_re  mynetid  R       0:18      1 q03
     695045_14  standard darts_re  mynetid  R       0:18      1 q04
     695045_15  standard darts_re  mynetid  R       0:18      1 q04
     695045_16  standard darts_re  mynetid  R       0:18      1 q04
     695045_17  standard darts_re  mynetid  R       0:18      1 q04
     695045_18  standard darts_re  mynetid  R       0:18      1 q04
     695045_19  standard darts_re  mynetid  R       0:18      1 q05
     695045_20  standard darts_re  mynetid  R       0:18      1 q05
     695045_21  standard darts_re  mynetid  R       0:18      1 q05
     695045_22  standard darts_re  mynetid  R       0:18      1 q05
     695045_23  standard darts_re  mynetid  R       0:18      1 q05
     695045_24  standard darts_re  mynetid  R       0:18      1 q05
     695045_25  standard darts_re  mynetid  R       0:18      1 q05
     695045_26  standard darts_re  mynetid  R       0:18      1 q07
     695045_27  standard darts_re  mynetid  R       0:18      1 q07
     695045_28  standard darts_re  mynetid  R       0:18      1 q07
     695045_29  standard darts_re  mynetid  R       0:18      1 q07
Cancel your render jobs
To cancel a specific render job, you can run the command:
$ scancel 695045
You can obtain the job ID either from the output message when you submitted the job or by checking through squeue.
Specifying the random seed in darts
To be able to average images rendered on different nodes, you'll want to specify the random seed for darts from the commandline. We did this by adding a --seed commandline argument to our implementation, and we used this value to specify the seed in the Scene's Sampler. When running your job you should then specify a different seed for each node which you can do by passing this command-line option to darts on the last line of your slurm script --seed $SLURM_ARRAY_TASK_ID.
References
Here are some useful links to help you become more familiar with the Discovery cluster and the SBATCH job submission system:
Connecting VS Code to a remote server
Now you are running Darts on the discovery cluster, you probably want to edit the code directly on the server. Visual Studio Code provides a convenient way to achieve this.
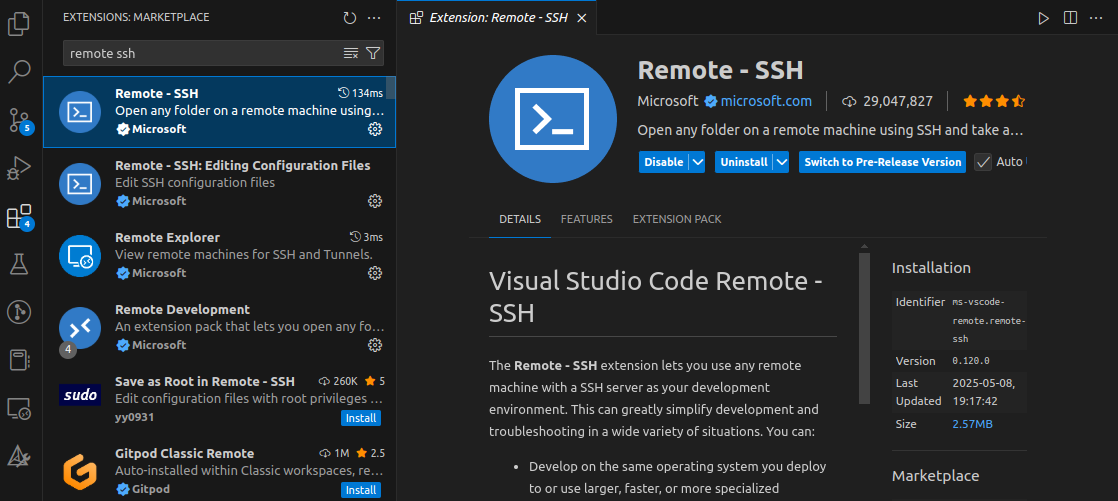
First install the Remote-SSH extension in VS Code by searching remote ssh in the marketplace.
Then execute the following commands to create a config file for the server address, which VS Code will automatically read from:
$ cd ~/.ssh
$ vim config
Write in the config file:
Host discovery8
  HostName discovery8
  User username
  PasswordAuthentication yes
and save with :wq. Again, your username is your seven-digit student ID.
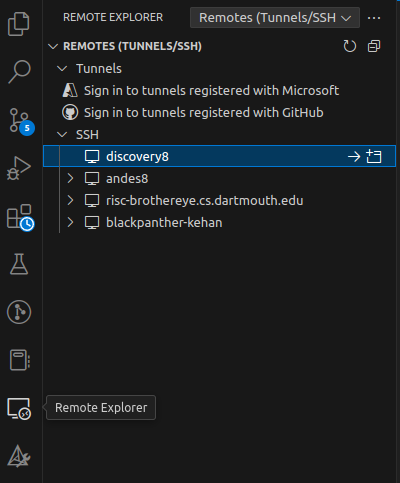
After saving the file, close and re-open VS Code, then go to Eemote Explorer in the leftmost column. You will find the discovery8 server under SSH.
Click on the left arrow button on the right, and the VS Code window would reload to access the server. A small window will pop up to ask for your password:

Once you input the correct password, the content on the server will be loaded. Click the Open Folder button, and the folders at the server root path will show up. Click on your Darts folder, then hit OK. This will load the folder content, and now you can directly edit Darts on the server.
